How to Install and Configure WordPress Plugins
Step 1: Choosing the Right Plugins
Selecting the right plugins is the first step towards enhancing your WordPress site. Consider the following factors:
- Functionality: Ensure the plugin meets your specific needs. For instance, if you want to improve SEO, choose a plugin designed for that purpose.
- Compatibility: Check if the plugin is compatible with your version of WordPress and other plugins you have installed.
- Reviews: Look at user reviews and ratings to gauge the plugin’s reliability and effectiveness
Optimising plugins is also vital. Overuse or poorly optimised plugins can slow down your site. Choose plugins that are well-coded and regularly updated to avoid performance issues.
Step 2: Installing Plugins
There are two main methods to install WordPress plugins: automatic and manual.
- Automatic Installation:
- Log in to your WordPress dashboard.
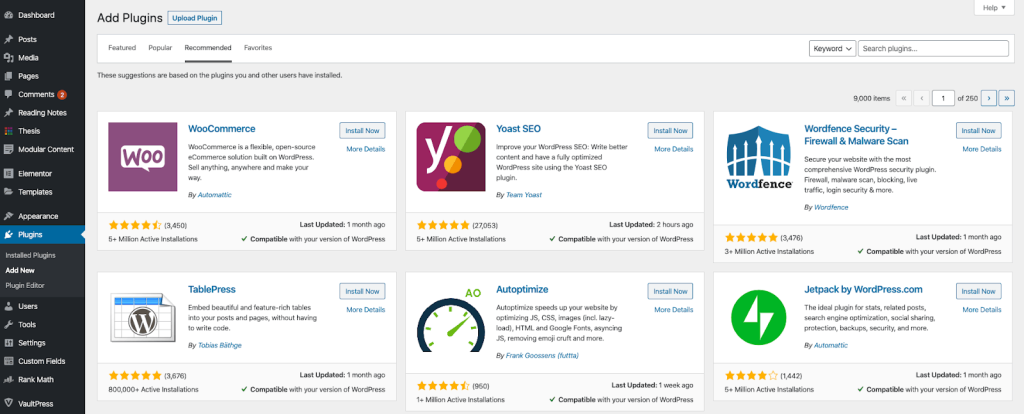
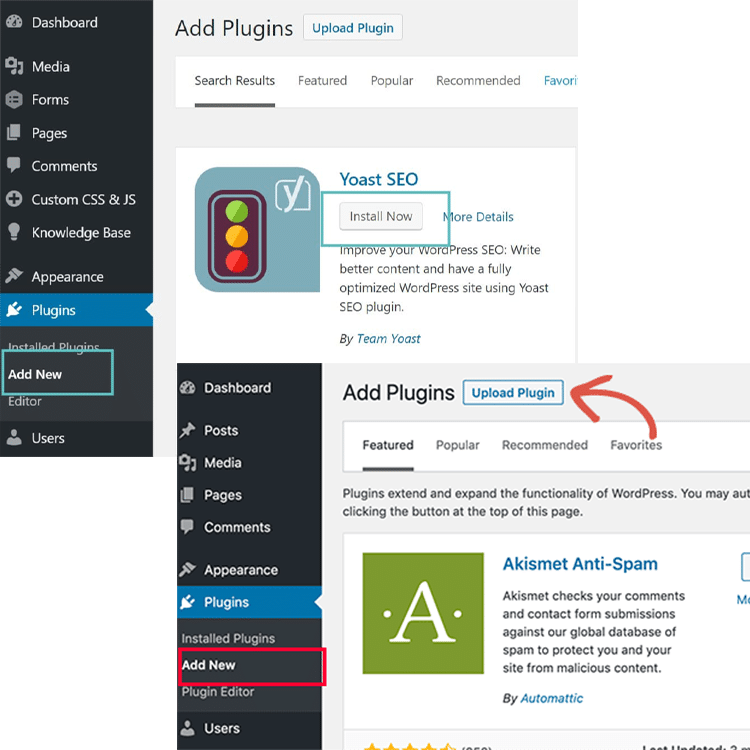
- Go to Plugins > Add New.
- Search for the plugin you want to install.
- Click Install Now and then Activate.
- Manual Installation:
- Download the plugin from a reliable source.
- Unzip the file on your computer.
- Log in to your WordPress dashboard.
- Go to Plugins > Add New > Upload Plugin.
- Choose the unzipped plugin file and click Install Now, then Activate.
If you encounter issues during installation, such as an error message or a failed upload, check the plugin’s documentation or support forums for troubleshooting tips. Common issues include file permission errors and compatibility conflicts.
Step 3: Activating Plugins
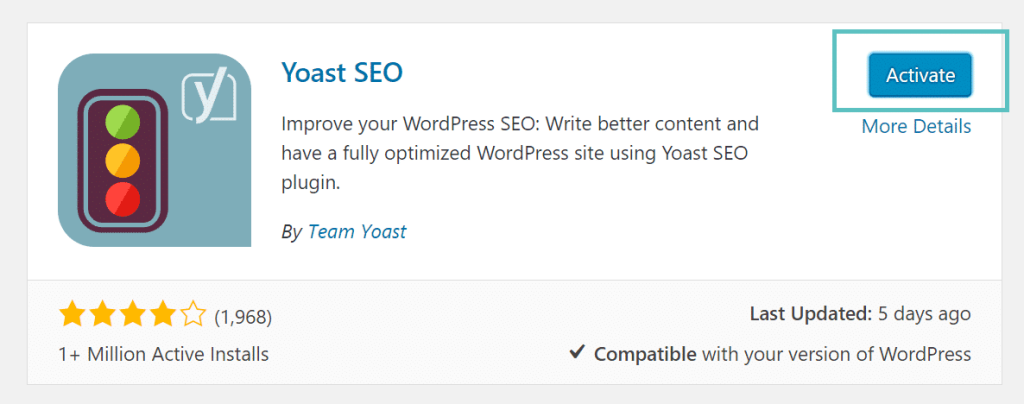
Once installed, plugins need to be activated:
- Go to Plugins > Installed Plugins.
- Locate the newly installed plugin.
- Click Activate.
After activation, test the plugin to ensure it works as expected. This step is crucial to confirm that the plugin integrates smoothly with your site.
Step 4: Configuring Plugin Settings
Customising plugin settings is essential to tailor functionality to your needs:
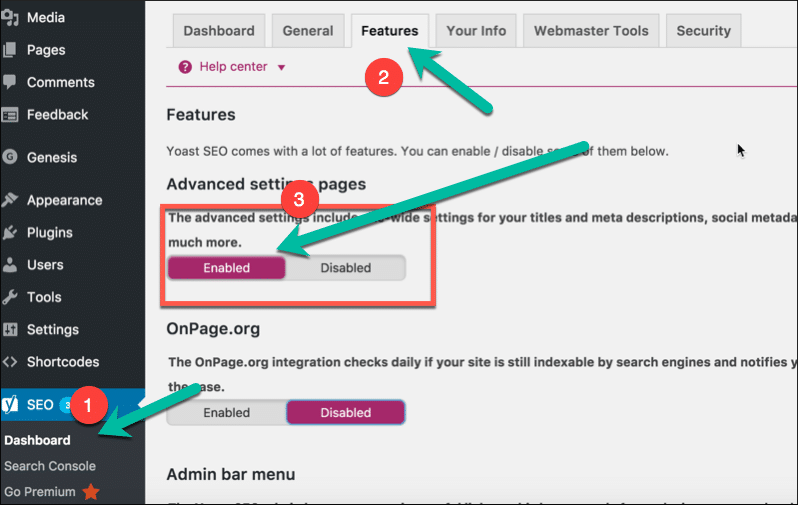
- Navigate to the plugin’s settings page, typically found under the Settings menu or within the plugin’s own menu in the dashboard.
- Adjust settings according to your requirements. For example, an SEO plugin may offer options to set meta descriptions and keywords.
- Review and save your changes.
Optimise plugin performance and security by regularly updating plugins and configuring them to minimise vulnerabilities. For example, if a plugin includes a feature to limit login attempts, enable it to enhance security.
Step 5: Troubleshooting Plugin Issues
If a plugin causes issues, such as conflicts or errors:
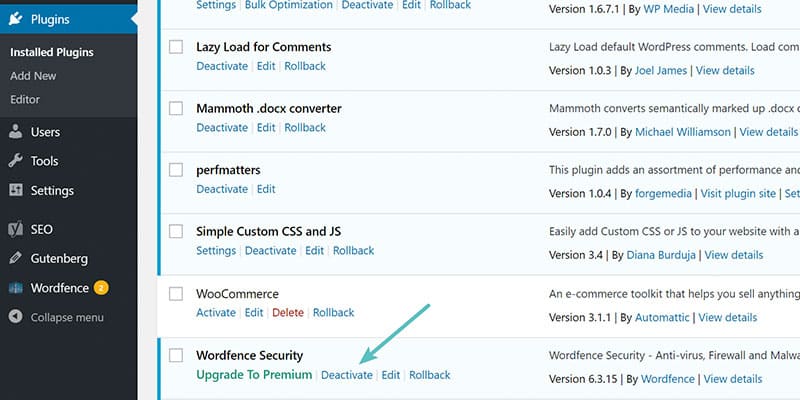
- Identify Conflicts: Deactivate other plugins one by one to determine if there’s a conflict.
- Check for Errors: Review error messages and consult plugin documentation for solutions.
- Update Regularly: Keep plugins updated to avoid security risks and compatibility issues.
Regular maintenance, including updates and checks for compatibility, helps prevent and resolve plugin-related problems.
Additional Sections (Optional)
- Creating Custom Plugins: For advanced users, custom plugins can be developed to meet specific needs. Learning PHP and WordPress coding standards is necessary for this task.
- Best Practices for Plugin Security and Maintenance: Regularly update plugins, use reputable sources for downloads, and review plugin permissions to ensure security.
Let's Find Out Our Success Stories & Social Buzz
Conclusion
Installing and configuring WordPress plugins enhances your site’s functionality and performance. By following these steps—choosing the right plugins, installing them correctly, activating and configuring settings, and troubleshooting issues—you can effectively manage and optimise your WordPress site. For expert assistance and top-quality plugins, explore Web Design Owl’s resources and see how they can help ensure the success of your website.
frequently asked questions
Can I install plugins directly from the WordPress dashboard?
Yes, you can install plugins directly from the WordPress dashboard by navigating to Plugins > Add New, searching for the plugin, and clicking Install Now.
What should I do if a plugin fails to install?
Check file permissions, ensure compatibility with your WordPress version, and consult the plugin’s support documentation for troubleshooting tips.
How do I configure plugin settings?
Access the plugin’s settings page via the WordPress dashboard, adjust the settings to fit your needs, and save changes.
What should I do if a plugin is causing issues?
Deactivate the plugin and check for conflicts with other plugins. Review error messages and consult the plugin’s documentation for solutions.
How can I prevent plugin conflicts?
Regularly update your plugins, test new plugins in a staging environment, and deactivate plugins one by one to identify conflicts.
How often should I update plugins?
Regularly check for and install updates to ensure security, compatibility, and performance. Aim for monthly updates or as needed based on plugin updates.

